Manual
0. Getting started
NEON PRECINCT is an engine and a set of tools for making beat 'em up action games. Everything is an HTML file, so it runs as soon as you open it in a browser — nothing to install, no internet needed. Your finished game also comes out as a single HTML file; whoever receives it just opens that file.
What's in the bundle
| Folder · file | What |
|---|---|
index.html | Start page — the way to the tools · demos · sample |
tools/ | Five tools — Sprite · Character · Stage · Game · Asset Forge |
engine/ | Engine — for loading a game JSON and playing it |
demos/ | Two demos made with these tools (Hyakki Yako · OVERTIME) |
samples/hyakki-yako/ | Sample — Hyakki Yako's characters · stages · settings as files you can open in the tools |
manual/ | This manual |
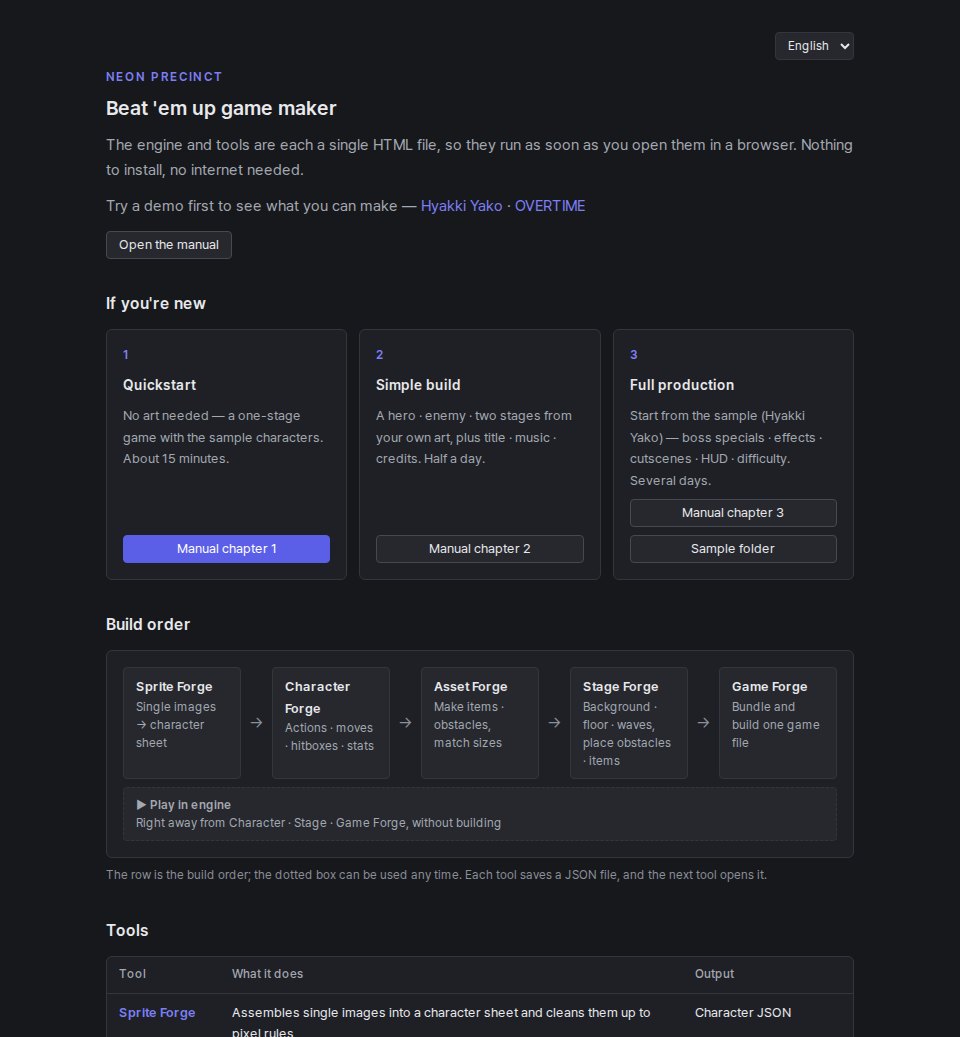
Choosing your level
If you're new, start from 1. Each chapter assumes you've done the one before.
Common to all tools
| Task | How |
|---|---|
| Save | The save button in the tool's bottom bar — downloads a JSON file. The next tool opens that file |
| Keep editing | Reopen a saved file with + … JSON load at the top of each tool |
| Try it right away | ▶ Play in engine in Character · Stage · Game Forge — try it in a new tab without building or saving |
| Undo | In Stage · Character Forge: Ctrl+Z · redo Ctrl+Shift+Z, or ↶ · ↷ in the bottom bar |
| Folding sections | Click a section title to fold or unfold it. In long tools, keep open only the sections you use |
| When closing | If you have unsaved edits, the browser asks once |
1. Quickstart
What you make — use the sample's (Hyakki Yako) characters · items · obstacles as they are, make one new stage, and build it into a single game file. No art needed.
| Tools used | Stage Forge → Game Forge |
| What you need | The sample's game package samples/hyakki-yako/hyakki-yako.game.json |
| Time | About 15 minutes |
| Result | One game file such as “My_First_Game.html” (about 11MB) |
Make a stage — Stage Forge
1Open Stage Forge
Open tools/stage-forge.html. A new stage template is already there — default background with three waves (3 grunts → 3 grunts · 1 elite → boss).
2Load the character list
Click + Load character list at the top of step 5 Waves and choose the sample's hyakki-yako.game.json. “List: 7” should appear. These characters appear as enemies, and when you try it the sample's hero (Nobutsuna) plays.
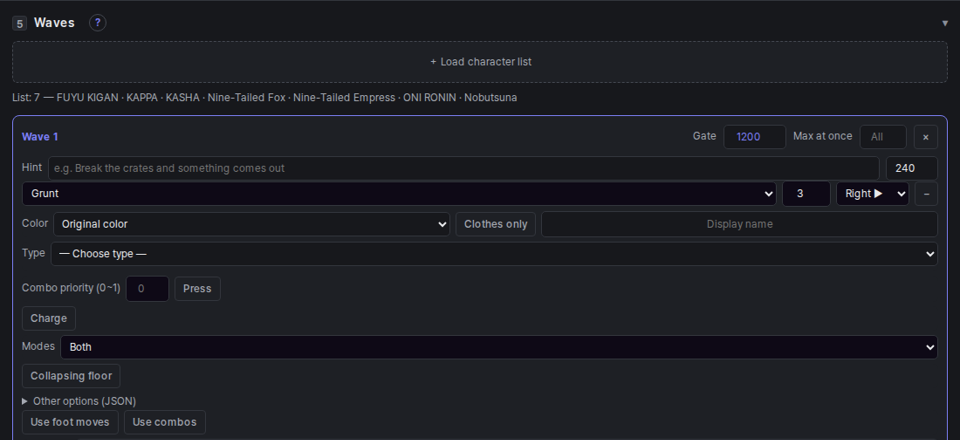
3Name it
Enter a name like “My First Stage” in Stage name under step 2 Basic info. Names in any language work — the id is made automatically so it doesn't collide.
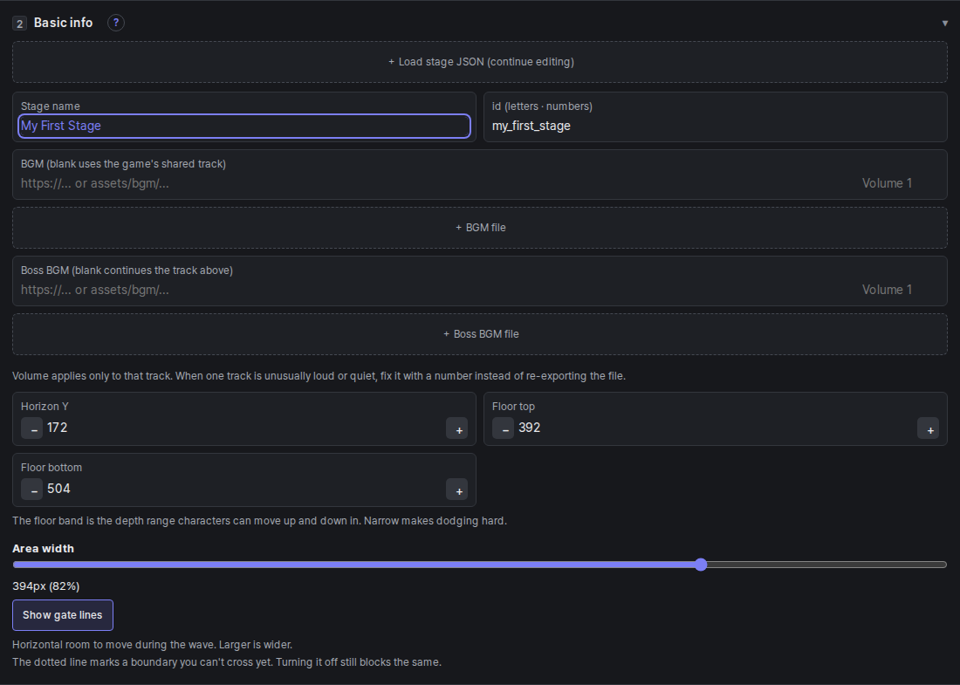
4Adjust the waves (optional)
It works as a game as is. If you want to change things —
- Enemy count — the number beside the tier
- Which character — the Character field. “Auto” spreads out the grunts from the character list; pick a name and only that character appears
- Add · remove waves — + Add wave below the waves · × at the top right of a wave
If a wave has a problem, the reason is shown with ⚠ at the top of that wave (e.g. “Too close to the previous wave”). Some things, like placing the first gate before 1200, are corrected automatically when you leave the field.
Try it and save
5Try it in the engine
Click ▶ Play in engine in the bottom bar and this stage starts right away in a new tab. After editing, click again to restart it in the same tab.

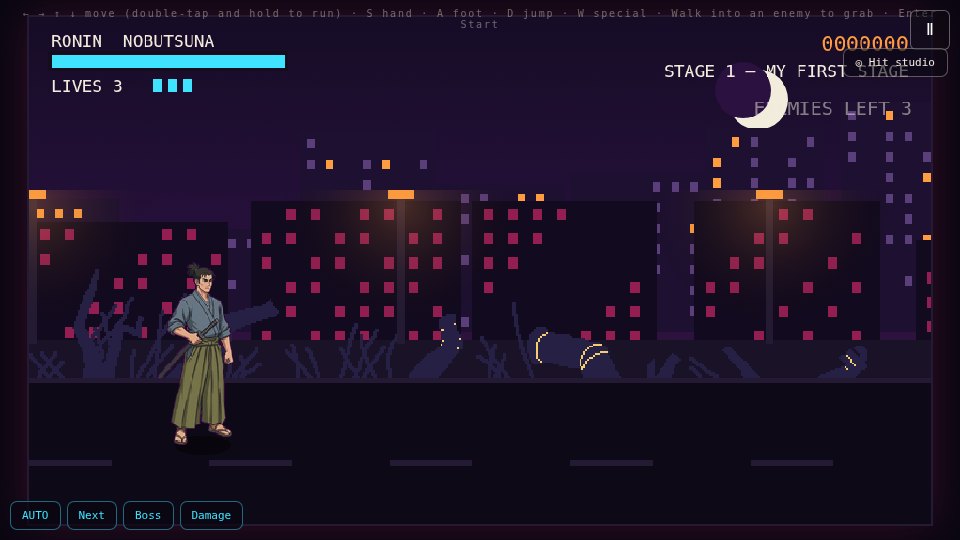
engine/ folder of the same bundle as the tools.6Save
Click Save stage and stage_…….stage.json is downloaded. You use this file in Game Forge.
Build it into a game — Game Forge
7Load the sample game
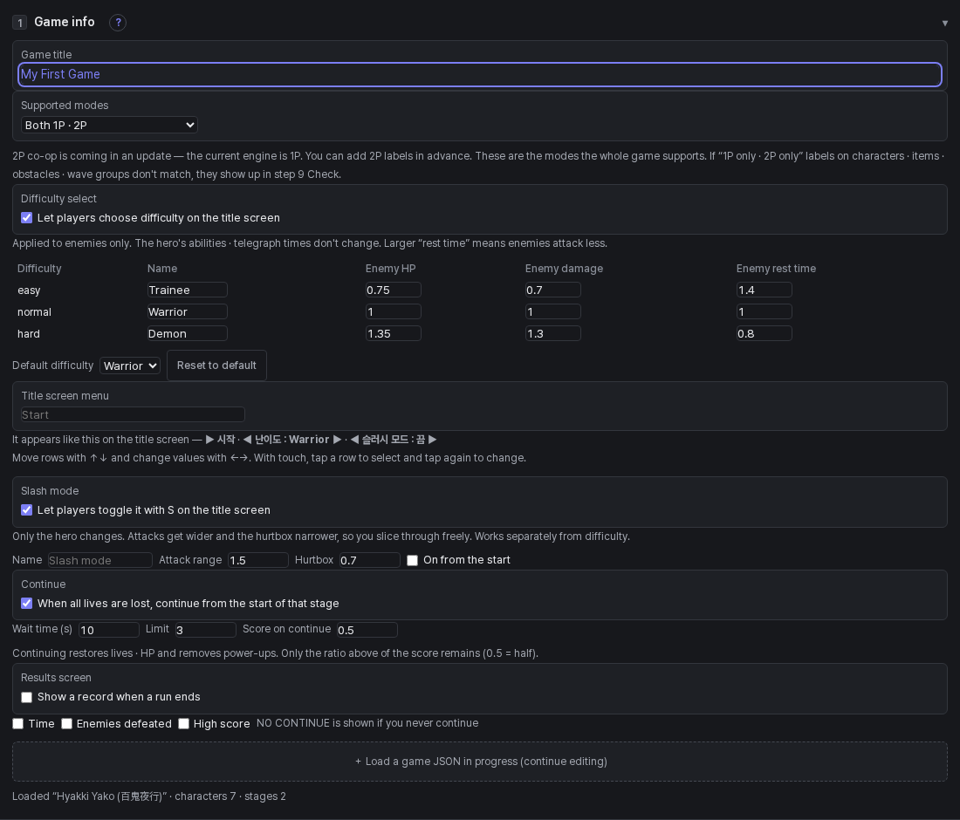
Open tools/game-forge.html and choose the sample's hyakki-yako.game.json with + Load a game JSON in progress (continue editing) in step 1 Game info. Characters · items · obstacles · presentation all come in.
Change Game title in the same section to “My First Game”. This title is used for the game file name and the browser tab title.
8Swap in your stage
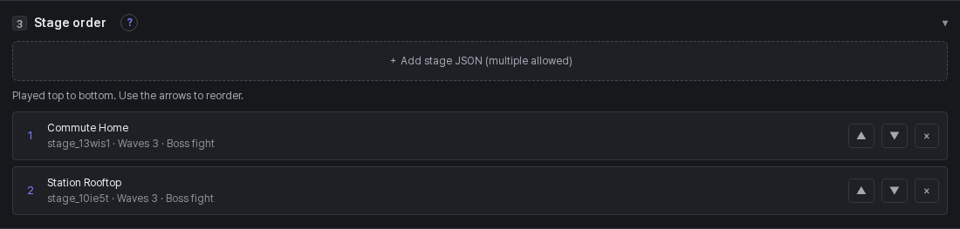
In step 3 Stage order, remove the two sample stages with ×, and add the file you saved in step 6 with + Add stage JSON. With several stages, they play top to bottom.

Here too, ▶ Play in engine in the bottom bar lets you try the whole game from the title.
9Build
In step 10 Build as a single file, choose the bundle's engine/neon-precinct.html with + Choose neon-precinct.html (only the first time — it's remembered after that), then click Build single file. “My_First_Game.html” is downloaded. Open that one file and the game starts.

2. Simple build
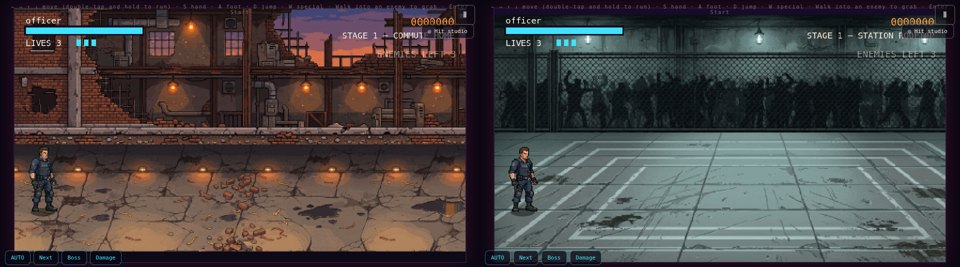
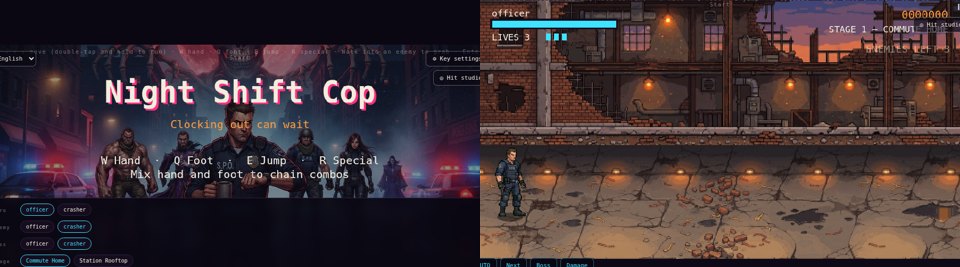
What you make — one hero and one enemy from your own art, two stages with your own backgrounds, and title · title art · music · credits, built as a new game. This chapter's example uses OVERTIME's Officer · Crasher · stage 1 · 2 art as “art I prepared.”
| Tools used | Sprite Forge → Character Forge → Stage Forge → Game Forge |
| What you need | Single character images (PNG), background · floor images (one each per stage), one title image, music files (ogg · mp3) |
| Time | Half a day if the art is ready |
| Result | One game file such as “Night_Shift_Cop.html” (the example is 2.5MB) |
Preparing art · file names
Character art is one PNG per action pose. Sprite Forge figures out the action from the English word in the file name. Put the character name at the front of the file name, and number multiple images of the same action at the end — e.g. officer_walk_1.png · officer_walk_2.png. The front part (officer) becomes the character name.
| Word in the file name | Action | Minimum set |
|---|---|---|
idle · stand | Standing | 1 image |
walk | Walking | 2–4 images |
punch · jab · attack | Hand attack 1 | 1–2 images |
hook · upper | Hand attack 2 · 3 | — |
kick · roundhouse | Foot attack 1 · 2 | — |
jump · jatk · jkick | Jump · jump attack · jump kick | — |
run · dash | Running | — |
hurt · hit | Getting hit | 1 image |
down · ko | Knocked down | 1 image |
For actions without art, the engine uses a similar action instead (e.g. standing if there's no jump art). The example Officer has 14 images (standing 2 · walking 4 · hand attacks 4 · foot attack 1 · jump · hit · down) and the Crasher 9. Transparent PNGs are best; with a solid background, Sprite Forge removes it for you.
Make the character — Sprite Forge
1Add the images
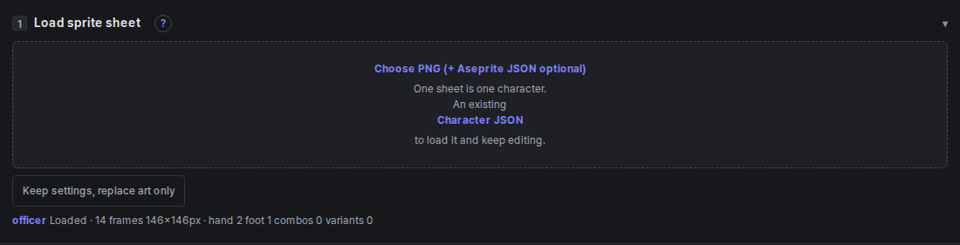
Open tools/sprite-forge.html and select all the images at once with Choose PNGs in step 1.

With a solid background, step 2 Remove background appears and removes it using the corner color. With transparent images, this step is skipped.
2Check alignment and assignment
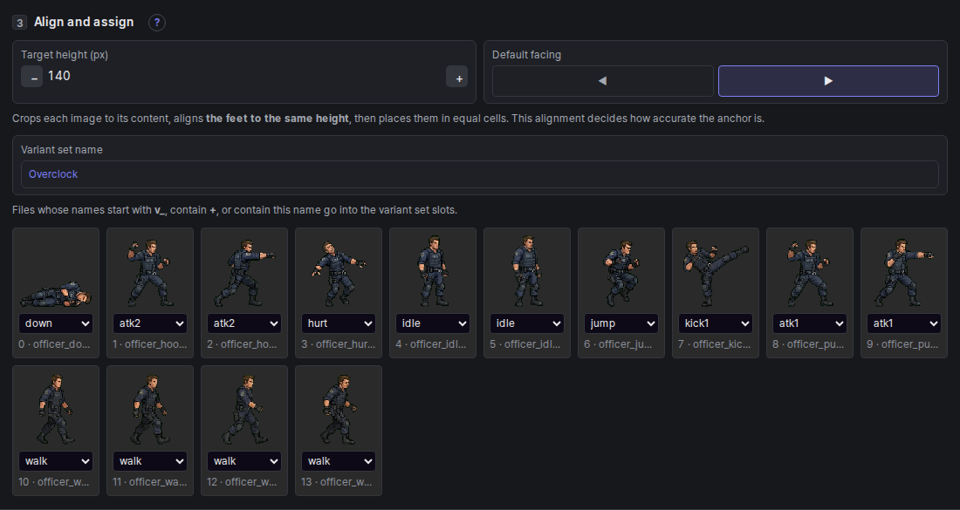
In step 3 Align and assign, each image is fitted into equal cells with the feet aligned, and actions are assigned from the file names. You can fix assignments with the selector under each cell.
- Target height (px) — the character's height in game. Match hero and enemy heights here
- Default facing — which way the character in the art faces
3Save as character JSON
Check step 4 Finished sheet and click Save character JSON in the bottom bar. officer.character.json is downloaded.

Step 5 Pixel cleanup is for tidying generated art into pixel art. You can skip it for the simple build.
Refine the character — Character Forge
4Load it and check
Open tools/character-forge.html and add the character JSON you just saved in step 1. The cells · actions · moves (hand · foot attacks) set by Sprite Forge come in as they are, and HP · speed start at their defaults.
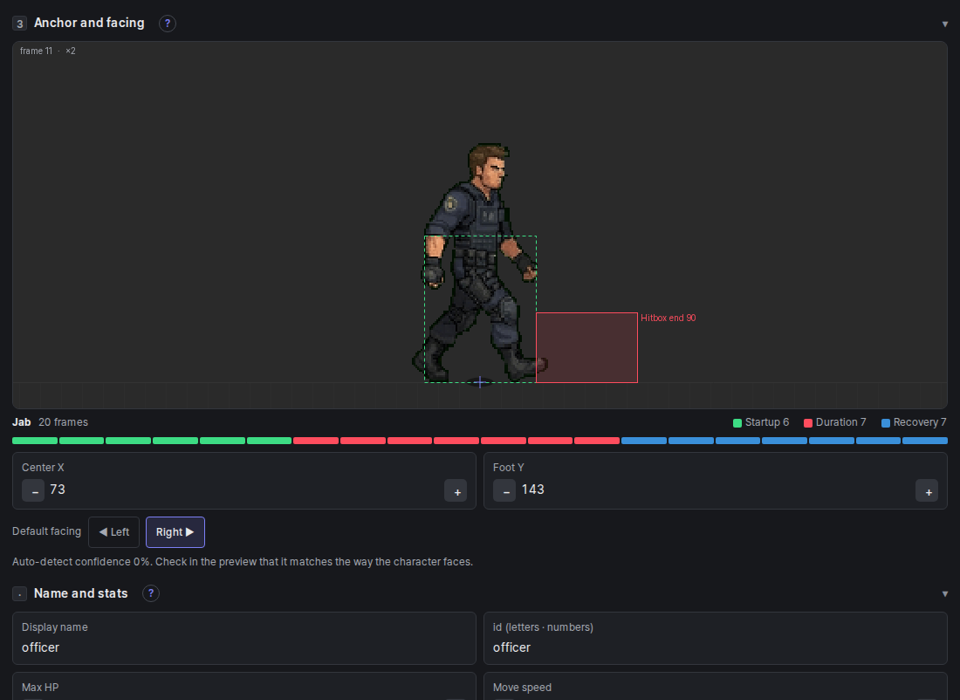
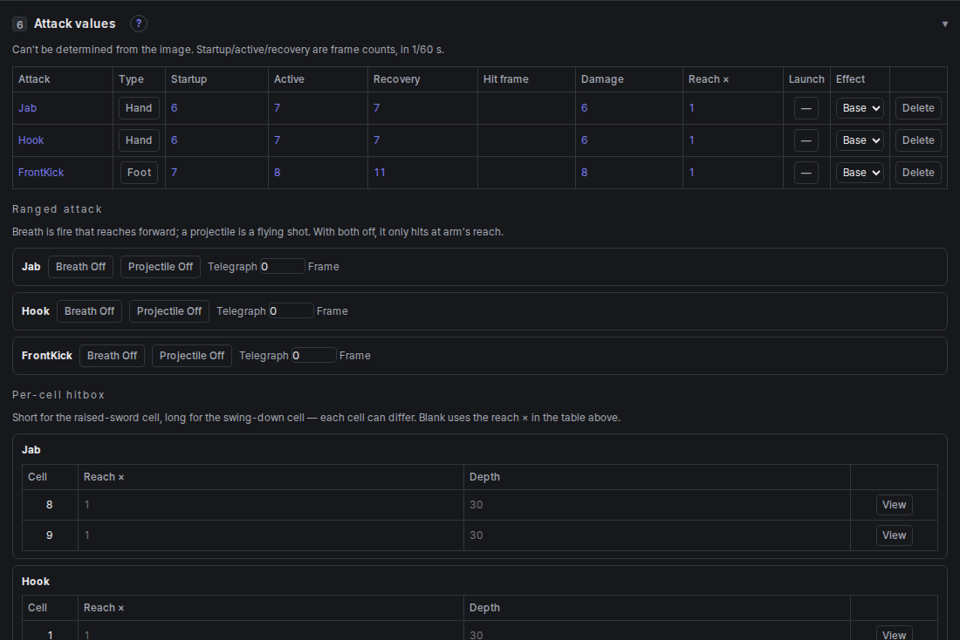
5Check feet · actions · attacks
Most can stay as they are. Fix things here if something looks off.
- 3 Anchor and facing — the point under the character's feet. Set automatically; move it if the character looks like it floats or sinks in
- 5 Action assignment — the cells and order used for each action
- 6 Attack values — startup · active · recovery time (frames), damage and reach per move. Start from the defaults and tune them by playing
- Name and stats (inside step 3) — display name · HP · move speed. In the example, only the Crasher's HP was raised to 160
6Try it in the test arena and save
Click ▶ Play in engine in the bottom bar and a test arena opens with this character as both hero and enemy. Check that attacks connect and that it gets hit and knocked down. After fixing, Save character JSON.
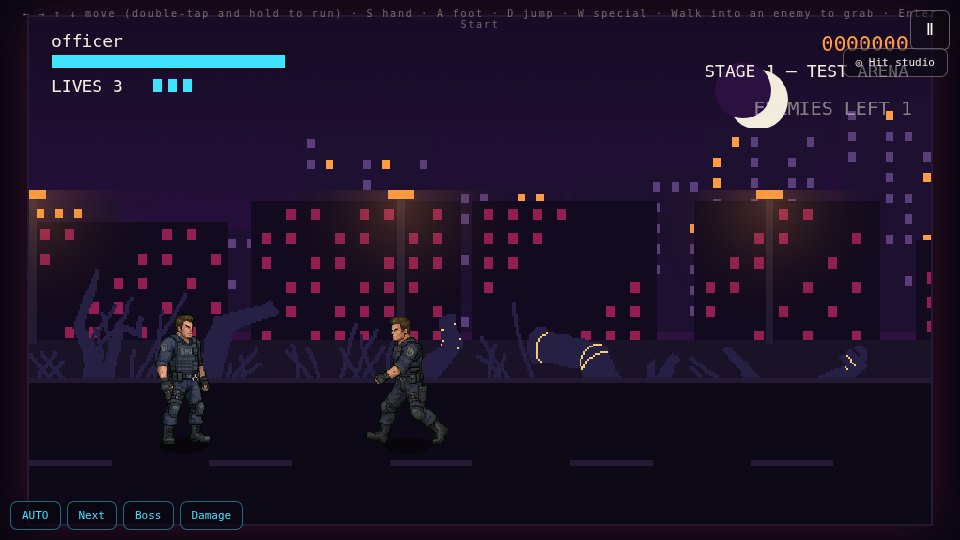
Make the enemy the same way. The example Crasher has 9 images (standing · walking 4 · hand attacks 2 · hit · down).
A stage with your background — Stage Forge
7Enter the floor lines first
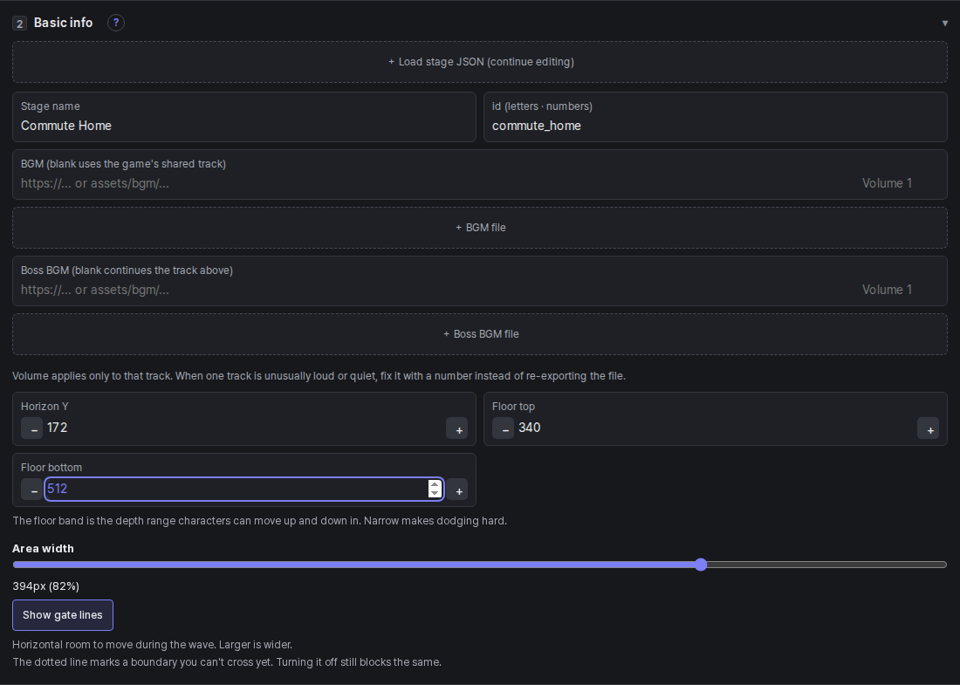
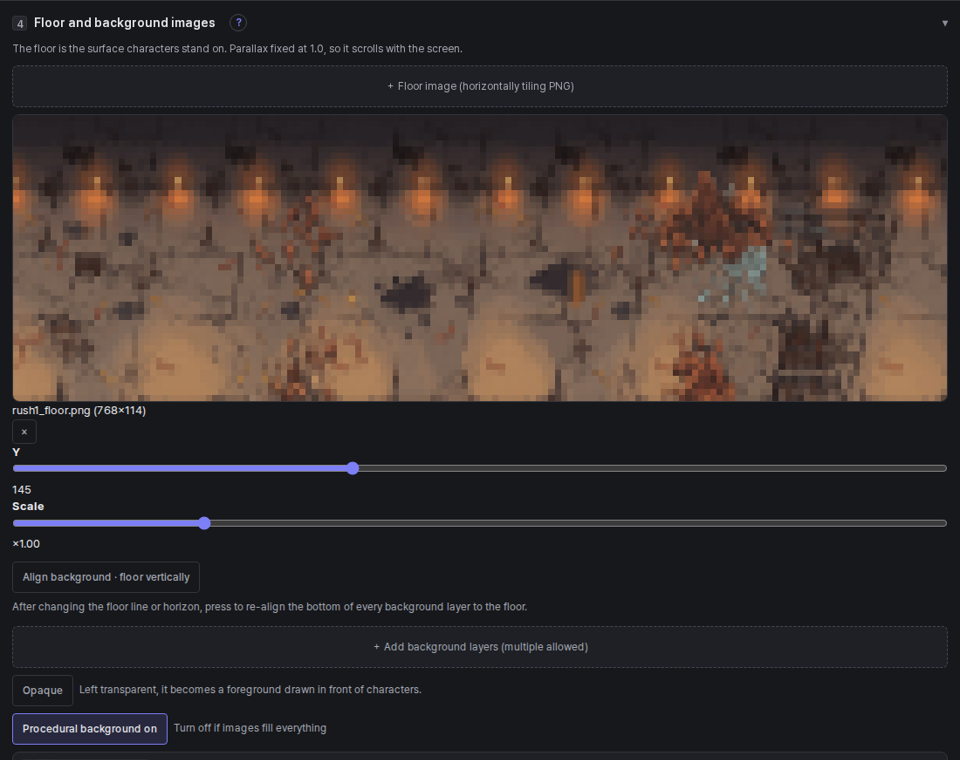
Enter the stage name in step 2 Basic info, and in Floor top · Floor bottom enter the top and bottom heights of the road in your background art (on a 540-tall screen — 340 · 512 in the example). Characters move up and down between them. Enter them before adding art and the art is placed to match these lines.
8Add floor · background images
In step 4 Floor and background images, add images with + Floor image and + Add background layers, and if the art fills everything, click Procedural background on to turn it off. Both work best as horizontally tiling images (they join up automatically).
9Swap the enemies for your characters
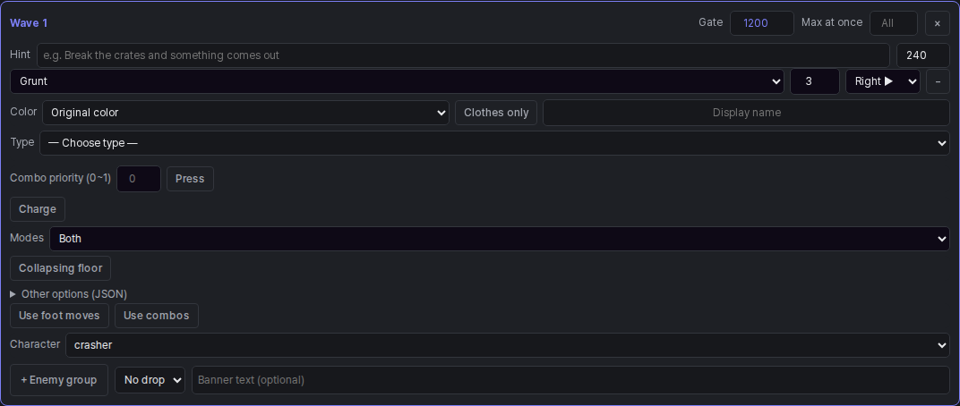
Select your character JSONs (hero · enemy) at once with + Load character list in step 5 Waves, and choose the enemy in the Character field of each enemy group.
Check it with ▶ Play in engine, then Save stage. Make the second stage the same way.
Bundle it as a new game — Game Forge
10Characters and roles
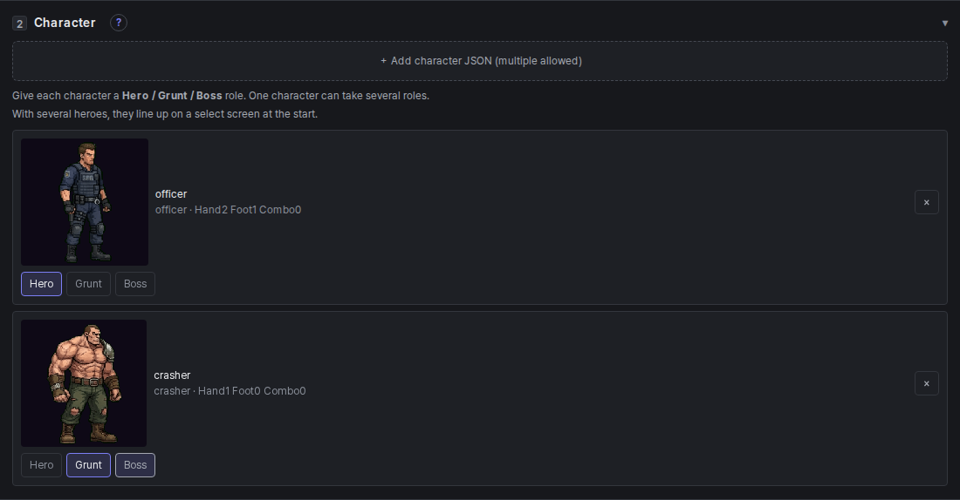
Open tools/game-forge.html fresh and enter step 1 Game title. Add the hero · enemy with step 2 + Add character JSON, and set each character's role by clicking Hero · Grunt · Boss. One character can take several roles.
11Stages · title · presentation
- 3 Stage order — add the two stages with + Add stage JSON. They play top to bottom
- 5 Title · release — subtitle. If the title art already has the title drawn in, “Don't draw title text on the title screen”
- 6 Presentation — + Title background image, + Default BGM file, and Credits at the bottom (one per line; start with # for large text). Opening · ending are skipped if you don't add them
12Try it and build
Check it from the title with ▶ Play in engine, then choose the engine file in step 10 and Build single file.
edit/items.json · edit/obstacles.json as they are. Load them in Stage Forge steps 8 · 9, place them in step 7, and add them in Game Forge step 4.3. Full production
What you make — a game at Hyakki Yako's level: a different strategy for each boss, move effects, opening · ending cutscenes, a customized HUD, and difficulty. This chapter explains, by taking the sample (Hyakki Yako) apart, where to change what for each feature. The meaning and values of every field are in the reference, linked from each section.
| Tools used | All five tools + the engine's hit studio |
| What you need | The sample samples/hyakki-yako/ — and having done chapter 2 |
| Time | Several days (depending on art · music preparation) |
| Result | One game file like Hyakki Yako (the sample is about 14MB — mostly video · music) |
Start from the sample
- Copy the whole
samples/hyakki-yako/folder and rename it. Keep the original sample to compare against while you edit. - For the whole game, open
hyakki-yako.game.jsonin Game Forge. For individual characters · stages, open the files inedit/in Character · Stage Forge. - An edited character replaces the old one when you add it again with the same id in Game Forge step 2 (its roles stay). For stages, remove with × in step 3 and add again.
- To reuse art · sound files, take them from
source/assets/. See “Usage scope” in the sample README for what's allowed.
Boss design
A boss is built from three layers: tier · behavior style · spawn options. The tier (boss · final) sets HP · size · moves used (Enemy tiers), the character's behavior style sets how it moves (Behavior styles), and the spawn options on the wave's enemy group create that boss's own strategy (Spawn options).
| Sample boss | Settings | What makes the strategy |
|---|---|---|
| Kasha (stage 1) | Behavior style tank, tier boss. Spawn options band 340 · breathRange 200 · chargeGap 200 · counterHits 4 · rage 0.4 · scale 2.034 | Keeps a distance of 340 and fires shells; breathes fire (breath) when close; rushes every 200 frames. Hits back after four consecutive hits. Rages below 40% HP (variant “Blaze”) |
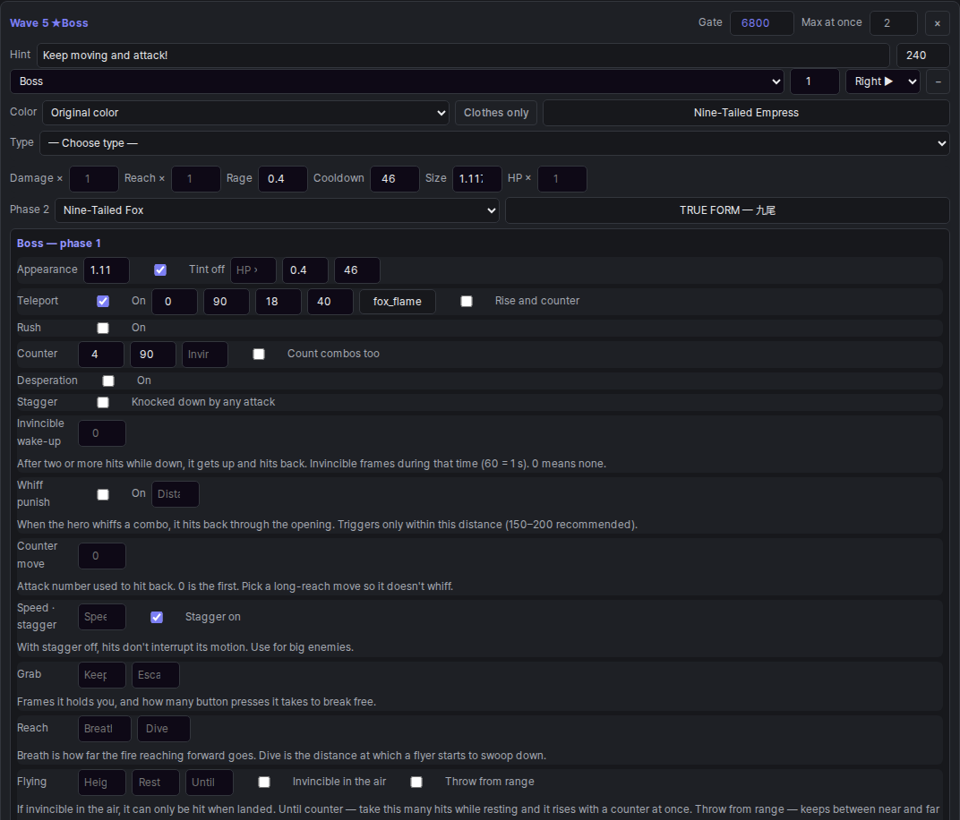
| Nine-Tailed Empress → Nine-Tailed Fox (stage 2) | Tier boss. blink (teleport, fox-fire effect) · cool 46 · rage 0.4 · nextForm (phase 2) | Vanishes when you're far and appears behind you. When defeated, transforms into the Nine-Tailed Fox (HP × 1.2 · damage × 1.35) with the banner “TRUE FORM — 九尾”. Desperation moves at 50% · 20% HP; hits back after two consecutive hits |
1Turn on special skills in Character Forge and paste them
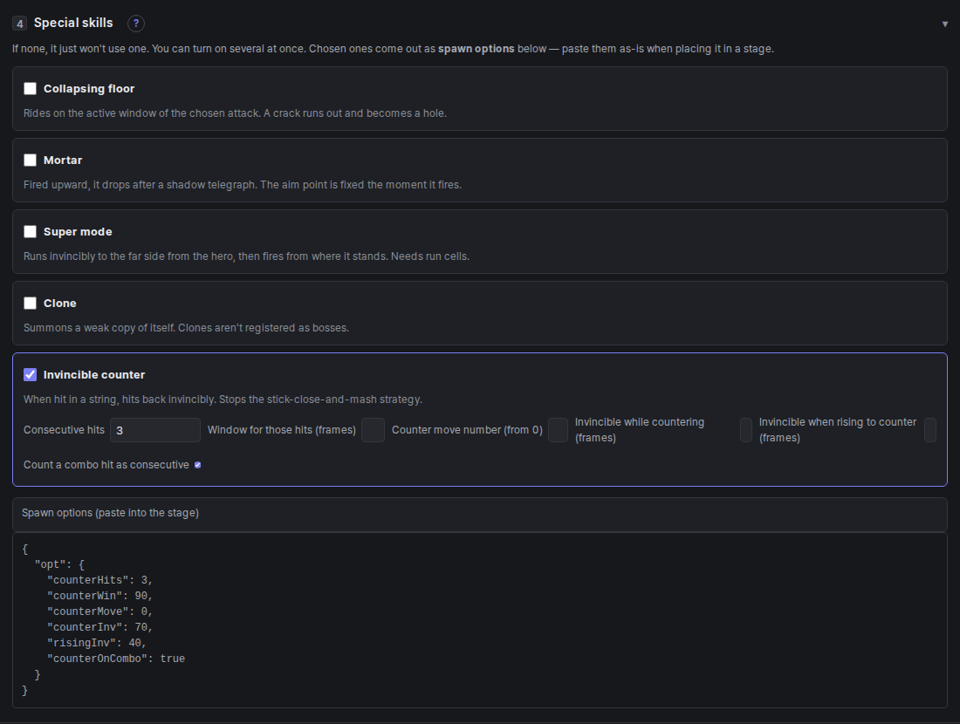
Turn on what you need in Character Forge step 4 Special skills and set the values; JSON appears in Spawn options below. Copy it and paste it into Other options (JSON) of an enemy group in a Stage Forge wave. Fields · defaults for each skill are in Reference — Special skills.
2Phase-2 bosses are set on the wave card
A boss-tier group can have a next form (nextForm). When the first form is defeated, it continues into the next character with a banner, and the next form gets its own spawn options (HP · damage multipliers, desperation moves, counters, etc.).
3Rage looks use variant sets
When HP falls below the rage ratio (rage), it switches to the variant set's look. Add a variant with Character Forge step 5 + Variant and assign cells for each action (Kasha's “Blaze”, the Nine-Tailed Fox's “Rage”). Without a variant, a red tint is used instead.
Moves · effects · combos
- Move speed and openings — Character Forge step 6 startup · active · recovery (frames). Short startup is fast; long recovery means a bigger penalty for whiffing. Set the hit frame and the hitting pose shows up timed to the start of the hitbox (Attack values).
- Breath · shots — in the same table, turn on breath (fire reaching forward, Kasha's “Fire Breath”) or projectile (shot, Kasha's “Cannon”). Shot art is in step 9 “Shot images”.
- Effects — add sword trail · flame sheets with step 9 + Add effect image, and pick one per move in the “Effect” column of the step 6 table.
- Command combos — step 7. 2–4 steps of hand · foot input, multi-hit (hits · gap), armor, super gauge. Two of Nobutsuna's five combos (Thousand Cuts · Final Stance) use one super gauge slot (Combo fields). Players see the inputs in the move list on the pause menu.
- Per-move feel — shake (shake) · freeze (freeze) · knockback (knockback) have no field in the tool, so open the saved character JSON in a text editor and write them on that move. Only that move uses the values (Reference — values with no field in the tool). The sample's Kasha fire breath has knockback 4.2.
Stage presentation
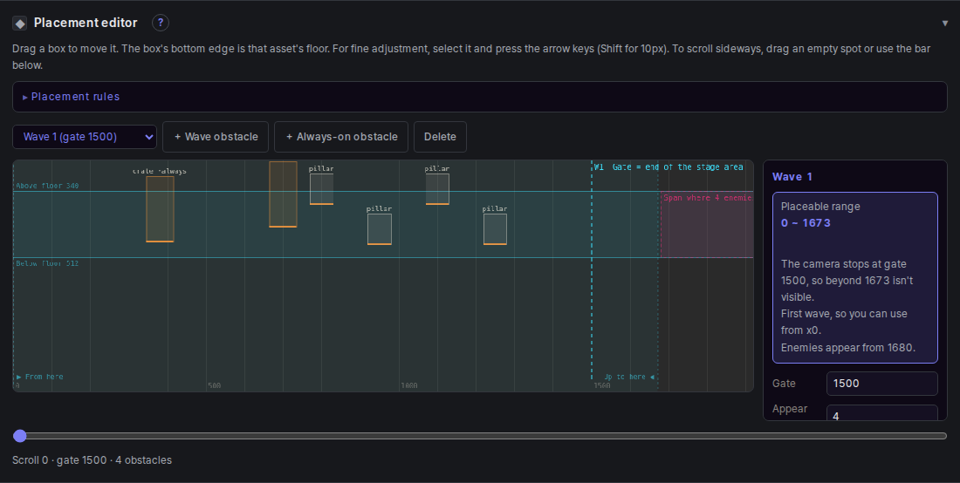
- Placement editor — in the Stage Forge ◆ section, drag gates · obstacles · enemy groups on the stage. Each wave shows its placeable range and problems (⚠).
- Hints · banners — tell the strategy in one line at the start of a wave (in the sample, “Dodge the rolling barrels” · “Pick up the chest and throw it”). Boss waves get the banner “BOSS — 火車 牛鬼”.
- Obstacles and drops — in Asset Forge Properties, set the obstacle kind (breakable · explosive · rolling · platform, 7 in all) · values · art and the item dropped when broken (in the sample, wooden crate → onigiri), then load them in Stage Forge steps 8 · 9 and place them in step 7. Each placement can also change size · drop (Obstacle kinds · Item kinds).
- Boss track · clear cutscene — boss BGM in step 2, clear cutscene in step 6 (the slides at the end of the sample's stage 1).
Game presentation · screens
- Notice screen — Game Forge step 6 “Copyright notice · studio logo”. Shown first when the game opens.
- Opening · ending — video (packed-in file or URL) or slides. “Continue music” carries the track into the next screen without cutting it. The sample opening is a video of about 33 seconds.
- Credits — one per line; start with # for a large heading.
- Multiple heroes — turn on two or more heroes in step 2 and a character select screen appears (background in step 6).
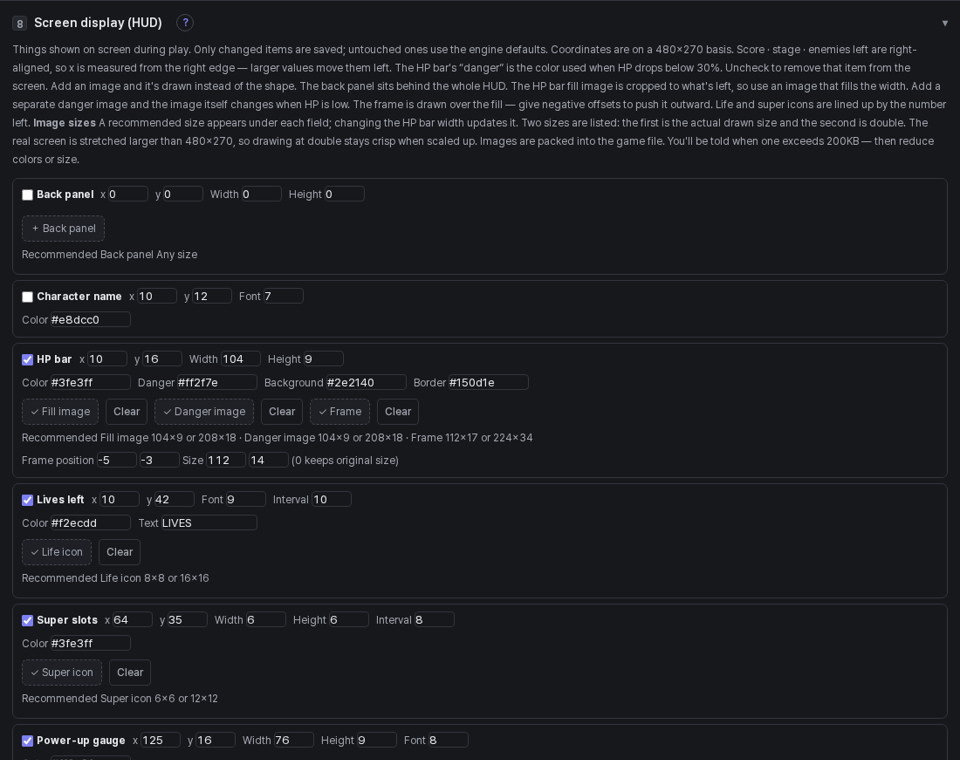
- Screen display (HUD) — step 8. Position · size · color and art (fill · danger · frame · life · super icons) for the HP bar · name · score · lives and so on (HUD elements).
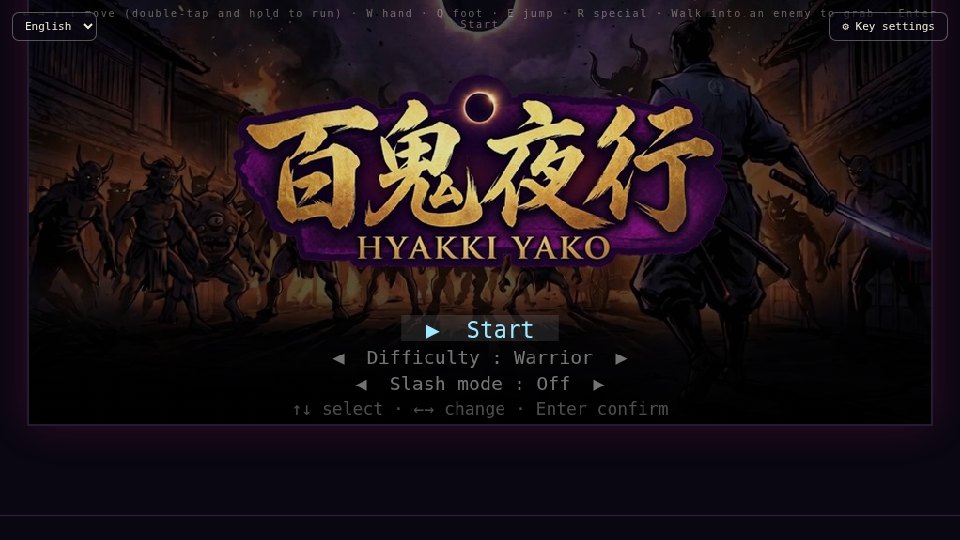
- Difficulty · slash mode · continue · results — step 1. The sample has difficulties Trainee · Warrior · Demon (enemy HP × 0.75 / 1 / 1.35), with slash mode off by default (Difficulty).
Tuning the feel — Hit studio
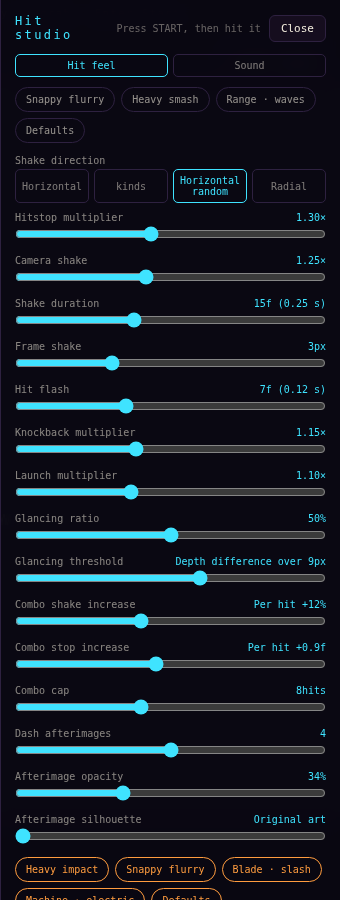
In ◎ Hit studio on the engine dev screen (the engine opened on its own, or a game built without “for release”), tune hitstop · shake · knockback · flash · combo scaling · afterimages while playing. When it feels right, click Copy settings and paste into the hit feel field in Game Forge step 7 (Hit feel). Adjust sound effect · music volume under Sound in the same window.
Polishing the art
- Pixel cleanup — Sprite Forge step 5. Fits generated art to pixel rules; save the palette (.gpl) to use the same colors on other characters.
- Item · obstacle · effect sizes — in Asset Forge, match position · size frame by frame while comparing against the hero (Asset Forge).
- Per-cell character fixes — Character Forge step 10 pose edit. A warning appears if something goes outside the cell.
Translation
Export game text (title · subtitles · credits · names) as CSV with Game Forge ◇ Translation sheet, translate it and import it back. The game shows text in the player's language (한국어 · English · 日本語).
Finishing up
- Make sure Game Forge step 9 Check shows no problems (missing characters · items · obstacles, settings that don't match the modes).
- Run each stage to the end with AUTO on the engine dev screen.
- Turn on step 5 Build for release and build. The first-time guide · pause · move list appear for players.
- File size is mostly video · music. If it's large, shorten the video or use slides, and switch music to ogg.
4. Reference
How to use every field in each tool and the meaning · unit · default of every value are in a separate reference (ref.html). The “?” in the tools links there too.